Showing posts with label painting. Show all posts

July 7, 2014

Worth the Work

Porch sitting is one of the summer past times that I most enjoy. I rarely have time that I feel I can spend that way. I have found that if people join you in your porch sitting it is even more enjoyable. I decided I needed to acquire more seating for my porch so more people could join me. 

This is what I found on one of our treasure hunts one Saturday morning. I knew it would take some work, but the price was right. Hello my sweet lil' glider.

"New" glider

 This is an example of what I had to work with. Many spots the wood was bare and many of those spots had some mold too. I knew I needed to be cautious with the mold. Protective garments, eye and respiratory protection were a must.
Lots of weathered spots

 I found it easier to take a bucket of bleach to the mold before I finished dismantling the entire thing.

A little muscle power and a scrub brush is all it takes

Here is what the frame looked like when we had it mostly dismantled.
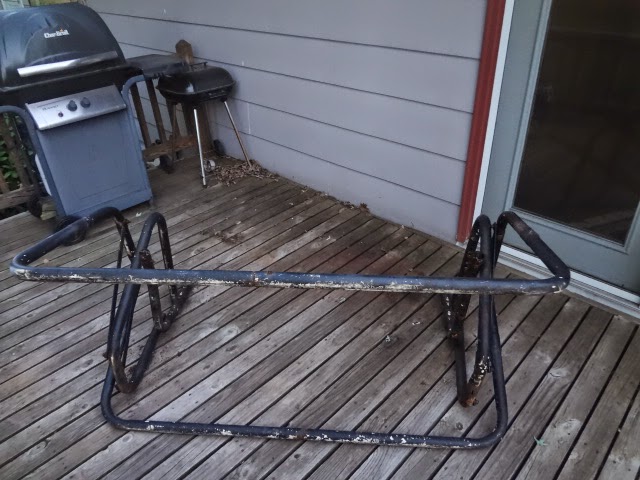
Lots of spots of surface rust

 The process involved  tearing the entire thing apart, sanding, scrubbing, sanding some more, priming, and then painting. It took a number of days to complete the process because I did one step each evening after I got home from work. When I got too tired I stopped working. It was worth the investment of time and energy. It is a welcome place to drink a cup of coffee in the morning and listen to the birds.


Here is the finished product. It has already weathered a couple of bad summer storms this year and came out wonderfully. Sometimes it is worth it to invest in some paint. I hope you too get a chance to sit and drink a cup of coffee and listen to the birds.

July 31, 2012

Christmas in July: Ceramics

Stephanie, Krista, and I had a crafty girls date early in July. We met for a quick dinner at a local deli and then headed to The Firehouse, a local ceramics studio. I painted a Christmas ornament for one of the many weddings that I have left this season. Krista painted a maple leaf candy dish and Stephanie painted a beautiful pink and blue spotted vase.

My ornament before paint.

Maple leaf before paint.

Krista painting her dish.

Doesn't this color just look like a burnt leaf?

Marissa painting her ornament.

Stephanie painting her vase.

Adding holly leaves.

All set for one lucky couple!

Marissa and Stephanie with their pieces painted.

Krista with her painted piece.
It took a few weeks for our pieces to be fired and ready for us to pick them up. We were glad for another opportunity to meet up for girl time. I live for quality time with these ladies!
Finished ornament.

Stephanie and Krista with their finished pieces.

Stephanie and I with our finished pieces.

July 4, 2012

Star Bright !

I want to wish you all a happy Independence Day!
This fun little bit of crafting is striking and economical. This is a paper star made to mimic the look of a metal star. I think a star would be nice for a birthday party or Christmas, as well as celebrating most anything.
I started with a scrap piece of light weight cardboard, (cereal boxes work great), and a star pattern. I got my pattern from Google. I traced the pattern onto the cardboard. I wanted my star a little larger than a standard size piece of paper that the printer allowed. I needed to add 3/4 of an inch to each side of the star to make it the size I wanted.

The next step is to score the cardboard from the tip of each point to the opposite side of the star.
When you are done scoring each point all the way across, you can then fold hills and valleys to make the dimensions of the star.

                                     
 Then paint your star any color that you find pleasing. Acrylic paint is the best option. I spray painted the entire star white to start with, then added color to each of the points.  After I got done painting I wanted to add some stars. I used a small star punch and scrap paper and some glue stick to add them to the blue field of my star.

I used regular paper glue, but Modge Podge would also work well.

I used and antique medium that I have on hand from some other project to add an aged appearance. I just used a rag to wipe on and wipe off the medium. I have been known to use shoe polish in a crafting "emergency".

Here is the finished project!!  I am very pleased with the results and will have this proudly displayed in my home.

May 15, 2012

Painting Posies

I really like painting but haven't taken the time to paint much recently. Props to my neighbor and artist Heidi for inspiring me! I used acrylic and interior paints on this project.
Mid-project
Finished project, hanging on my wall!