I used this tutorial, which I found on Pinterest, from Hands Occupied. What hand made Christmas gifts did you give this year?
Showing posts with label Christmas. Show all posts
January 2, 2014
Pocket Square Christmas Gift
I wasn't able to sew as many Christmas gifts this year but I was able to make a few pocket squares for Paul. They were very inexpensive because I purchased satin remnants on sale from JoAnn Fabrics. However, sewing a traditional pocket square with a rolled hem by hand did take much longer than I thought it would!
I used this tutorial, which I found on Pinterest, from Hands Occupied. What hand made Christmas gifts did you give this year?
December 24, 2013
Christmas Muff
Santa's elf (aka, me) was working late into the night on this one final Christmas gift, a muff to perfectly accessorize a Christmas Eve outfit! I found a wonderful tutorial from Scattered Thoughts of a Crafty Mom here.
Once all of my pieces were cut out (I used two pieces batting) I lined them up and "quilted" them. Unlike the instructions I was following, I had one inch hanging over on each end and decided to only make three seams in the middle.
I had a bit of difficulty interpreting the pattern and accidently sewed the lining to the top and bottom of the outer material before pulling out those seams and sewing them to the sides correctly.
After getting the side seams sewn correctly I turned it right side out. At this point I stopped following the instructions because I wanted all finished seams inside the muff. I pinned the top fabric, the handle, and part of the lining together and sewed it from the inside, leaving only a small opening to be hand whipped or top stitched closed.
The muff was a huge success and looked great with a cream and gold Christmas dress!
Once all of my pieces were cut out (I used two pieces batting) I lined them up and "quilted" them. Unlike the instructions I was following, I had one inch hanging over on each end and decided to only make three seams in the middle.
I had a bit of difficulty interpreting the pattern and accidently sewed the lining to the top and bottom of the outer material before pulling out those seams and sewing them to the sides correctly.
After getting the side seams sewn correctly I turned it right side out. At this point I stopped following the instructions because I wanted all finished seams inside the muff. I pinned the top fabric, the handle, and part of the lining together and sewed it from the inside, leaving only a small opening to be hand whipped or top stitched closed.
December 17, 2013
Christmas Party Refashion
This fun royal blue silk number was sent to me by a family member for re-hab. It had a number of stains on the lower half of the skirt, but I LOVED the color and knew just what I wanted to do with it.
| Before |
| and I loved this detailing along the waist! |
The first step was to cut off the stains at the bottom of the dress. However, that length was a little awkward (not really a dress, not really a shirt...) so I cut it a few more inches. Then you could tell it was supposed to be a top. I had to be careful of the back zipper though, because the garment was originally a dress, the zipper is quite long.
Step number two, remove those 90s shoulder pads!
The third step was to hem the lining and outer layer, making sure to hem the lining higher than the outer layer so it wouldn't hang out. After a quick press I was really to go to my Christmas party!
November 23, 2013
Bias Tape Baby Bib
This was the most quick and easy baby project ever! I started with a piece of quilted material, cut in the shape of a bib, and bias tape. When using bias tape you will notice that one side is slightly longer than the other, this side should always be on the bottom of your project.
First, I cut a piece of bias tape for the center of the bib.
My mom's tip for bias tape is to pin it to the back side of the project and baste it on first, sewing inside the first fold.
Once the bias tape was sewn onto the back I pinned the rest to the front side and top stitched leaving a finished edge.
I followed the same steps for the outer edge, leaving tails to use as ties.
Ta-Da, the project was very inexpensive and done in minutes!
November 16, 2013
Holidazzle
Today my Mom and I went to the biggest and best craft show in town and came home with a TON of ideas.
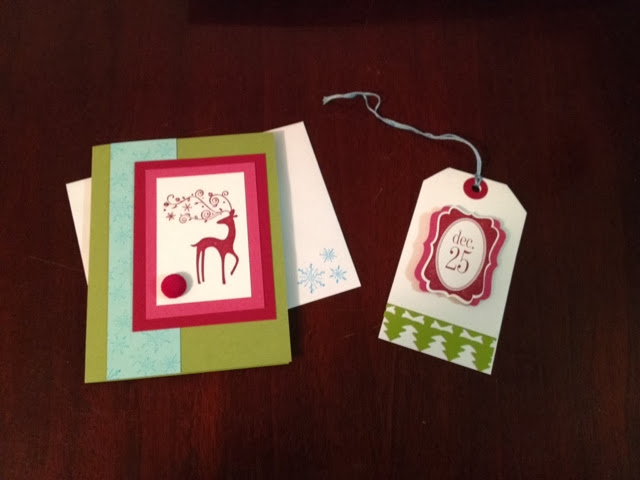
To kick off our holiday crafting we made a set of Christmas cards and gift tags inspired by Creative Memories Holidazzle Gift Wrap.
The cards were made with Stampin' Up paper colors, Lucky Limeade, Cherry Cobbler, Rose Red, Pool Party, and Whisper White, Stampin' Up stamps Dasher and Tags 'til Christmas, and Stampin' Up punches.
January 31, 2013
Thrifty Christmas
Have I mentioned recently how EPIC my in-laws are? Well just in case I haven't, let's talk about it again.
They gave me some cash for Christmas, along with far too many gifts, and I quickly spent it all at the local Goodwill building my wardrobe. Check out my finds!
I purchased these last three items at the same time and plan to given them a few tweaks. Stay tuned to see how they turn out!
THEY ARE THE BEST!
They gave me some cash for Christmas, along with far too many gifts, and I quickly spent it all at the local Goodwill building my wardrobe. Check out my finds!
| Maroon H&M Argyle Sweater |
| Navy Vintage Nautical Skirt |
| Navy and White Pinstripe Slacks |
| Navy and White Leather Loafers |
| Brown Strapping High Heels |
| Black and White H&M Woven Slacks |
| Navy and White Vintage Sweater |
| Royal Blue Tommy Hilfiger Blazer |
December 26, 2012
Gifts
I hope that you all had as wonderful of a Christmas as I did! Paul and I were able to spend multiple days with each of our families, attend church multiple days IN A ROW (!), and share gifts with our loved ones. Below are three of my favorite gifts that I received this year.
![]() |
| Dritz Dressform Watch for more sewing soon! |
| Personalized Sewing Labels |
![]() |
| Paisley Infinity Scarf from Desiring Joy. |
![]() |
| Christmas Revolution Gift Cards to spend on one or more amazing charity! |
I also made the below hand sewn gifts for family members. Did you make any gifts this year?
![]() |
| KitchenAid Mixer Cover |
| Fleece Bathrobe |
| Bow Clutch Also for sale on my Etsy |
| Chapstick Key Fab Also for sale on my Etsy |
| Infinity Scarf Also for sale on my Etsy |
December 25, 2012
Antique Button Bracelet
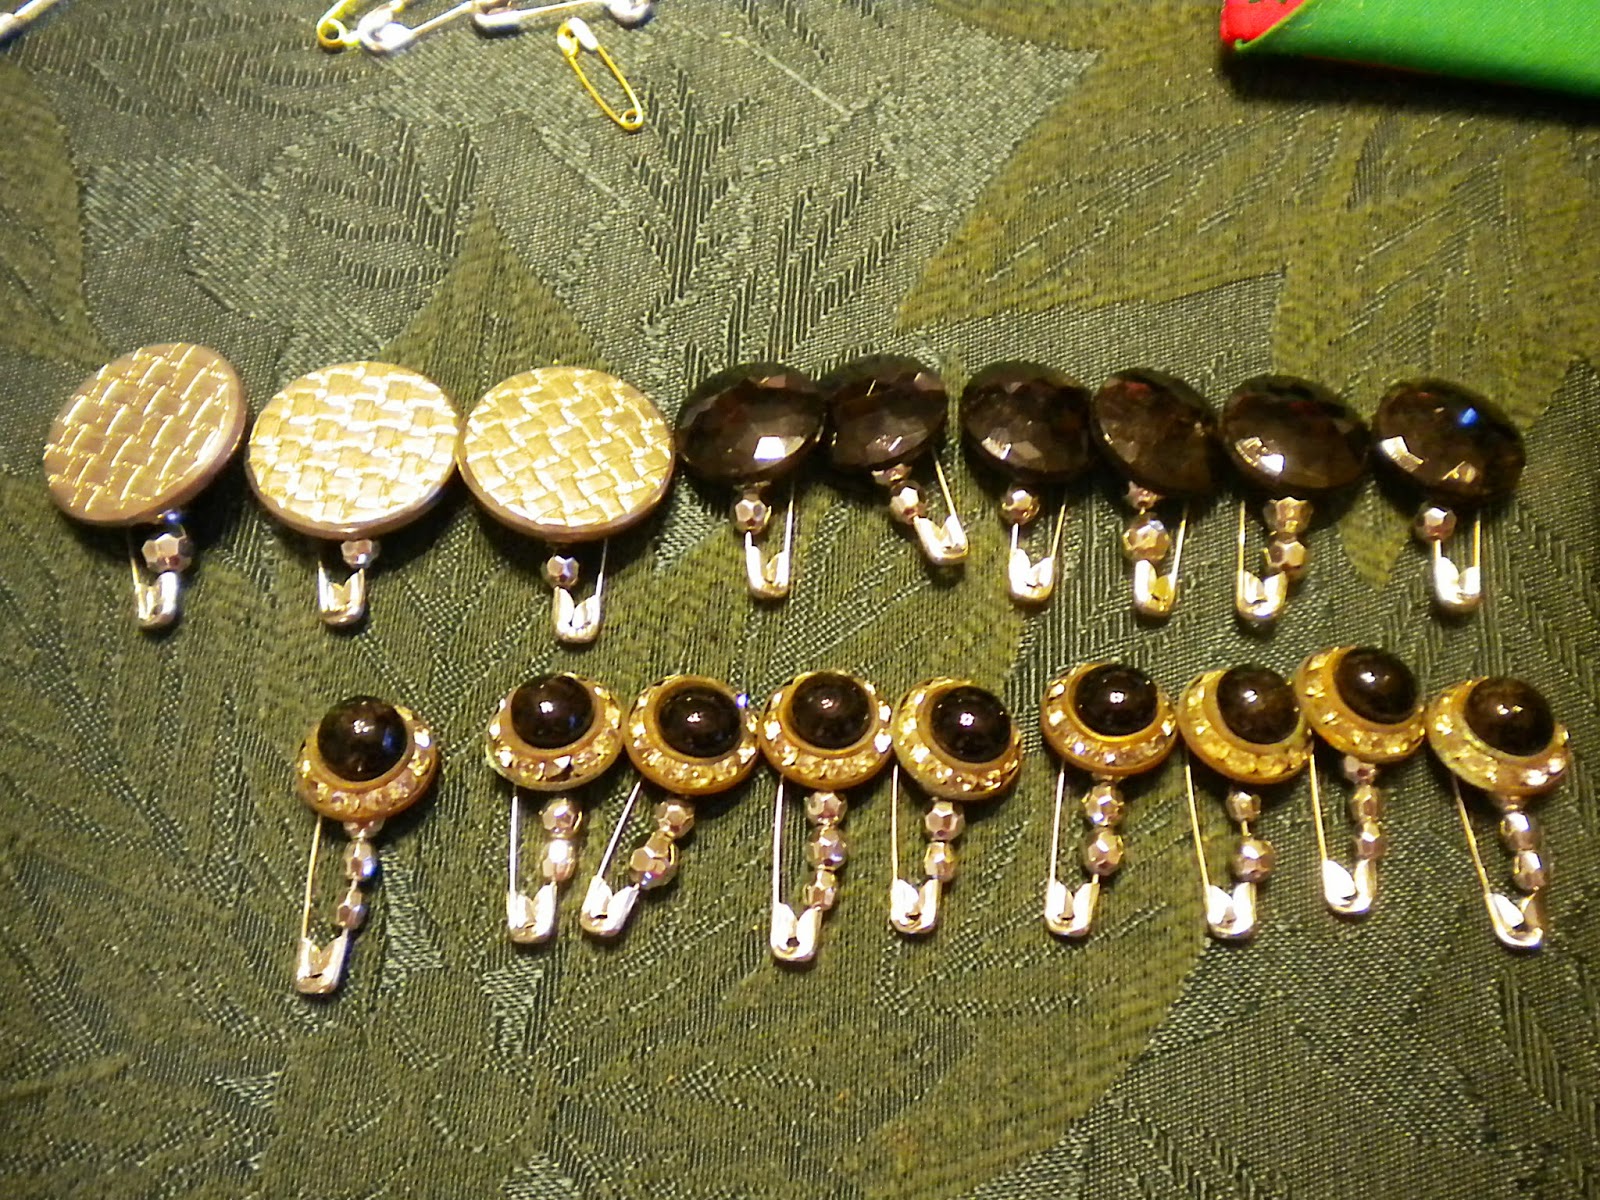
Each Christmas, once we've read the Christmas story, all the gifts are opened, and nearly all of the food consumed, the women in our family like to visit while we do a craft. This year my sister Karen brought an antique button bracelet craft for us to assemble.
If you would like to make a similar bracelet you will need:
- 20-25 buttons
- 20-24 inches of 1/8" elastic
- 20-25 medium safety pins
- 40-50 small beads
- 40-50 pony beads
| Safety pins with buttons and pony beads laid out to be threaded. |
Step 2: Cut two equal lengths of elastic, both slightly longer than your wrist. Thread one piece of elastic through the circular end of the safety pin. Thread the other piece of elastic through the closed, pin end of the safety pin.
Step 3: Thread one pony bead on each elastic piece. Next, add another safety pin with button to each of the elastics, upside down. Continue in this pattern, adding safety pins with buttons in opposite directions, until you have used all of your safety pins with buttons and the elastics wrap around your entire wrist.
![]() |
| Inside of bracelet. |
Step 4: To finish bracelet sew each piece of elastic together at the ends.
| Finished product. Great way to display and enjoy your antique buttons! |
December 23, 2012
Advent Adornment
The Advent wreath has been a part of the Christmas tradition since the 15th century. Advent is a time of reflection and waiting. Here is the advent wreath that I had the honor of preparing for our church this year.
The wreath developed after I had a chance to view the Advent graphics that would be used at our church. I was impressed with the simple lines and colors that I saw and decided that often simple is best. So tried to mimic the graphic with materials that would be readily available locally.
I started with the traditional green wreath to represent eternal life. I added red grapes and grape vines remembering that Jesus referred to himself as "the vine" in John 15. The wheat element is actually an ornamental grass because I didn't have any wheat available and this grass had greater impact from a distance. Wheat of course is remembering that Jesus is "the bread of life" as noted in John 6. The black frame is actually a black serving tray covered with black scrapbook paper. I used crayons to create the chalk board look. The plate is supported on a picture easel that fits inside the wreath.
Today was the fourth Sunday of Advent so all of the candles have been lighted. They represent Hope, Preparation, Joy and Love. Tomorrow we will light a white candle to represent the birth of Jesus our Saviour.
"Look, the virgin shall conceive and bear a son, and they shall name him Emmanuel." which means, "God is with us."
-Sheryl
The wreath developed after I had a chance to view the Advent graphics that would be used at our church. I was impressed with the simple lines and colors that I saw and decided that often simple is best. So tried to mimic the graphic with materials that would be readily available locally.
I started with the traditional green wreath to represent eternal life. I added red grapes and grape vines remembering that Jesus referred to himself as "the vine" in John 15. The wheat element is actually an ornamental grass because I didn't have any wheat available and this grass had greater impact from a distance. Wheat of course is remembering that Jesus is "the bread of life" as noted in John 6. The black frame is actually a black serving tray covered with black scrapbook paper. I used crayons to create the chalk board look. The plate is supported on a picture easel that fits inside the wreath.
Today was the fourth Sunday of Advent so all of the candles have been lighted. They represent Hope, Preparation, Joy and Love. Tomorrow we will light a white candle to represent the birth of Jesus our Saviour.
"Look, the virgin shall conceive and bear a son, and they shall name him Emmanuel." which means, "God is with us."
-Sheryl
Subscribe to:
Posts (Atom)